Unity Tutorial | Glowing Textures With Shader Graph
- Polycarbon Games
- Mar 27, 2021
- 3 min read

Welcome to another quick tutorial from Polycarbon Games. Today we are going to show you how to quickly create a gradient glow shader using Unity 3D’s shader graph. Let's get started. You can also watch the Video, scroll to the bottom.

First thing you are going to do is right click in the project folder, and go to create, Shader then go to Unlit graph. Now name your new shader any name you want. Then double click your shader to open shader graph

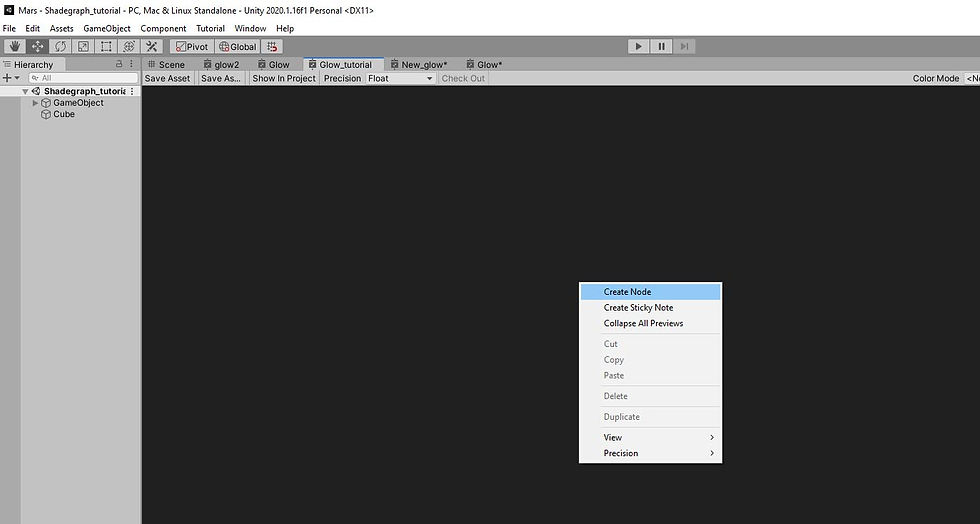
Right click in the shadergraph area.

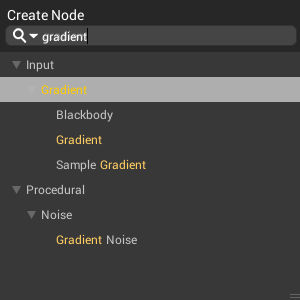
Next we are going to create a new node, we are going to look for gradient nodes, you can type it in the search bar and it should pop up.

The gradient node looks like this below. You can click on the default color white bar to change the colors.

Next we need to grab ourselves a Sample Gradient node. You can right click and type in "sample gradient" and it should pop up.

Take the output of the gradient and connect it to the sample gradient. You will notice the gradient node is white by default.

Click on the default gradient color to change the gradient to whatever color you want.
Next we need to make sure it tiles, so we are going to go to the UV shelf and look for the node, tile and offset. Then we are going to need a split node. Connect the output of tiles and offset node to the split nodes input, then we want to connect the split node to the Sample gradients Time input. Look at the picture below for an example.

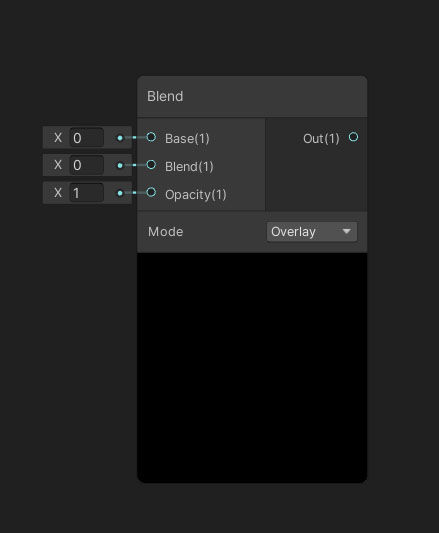
Now we want to create our blend nodes, you can just type in Blend in the search bar and grab the blend.
Now let's connect the Sample Gradient output to the the Base(4) input and the Blend(4) input of our first blend.

Now lets create another blend node.

Lets go to the far left and create a vector1, this will control the emission properties, basically how much it will glow.

Click the plus button to bring up the menu

We name it emission.

After that grab your emission node and drag and drop it into the node area.

Take the first blend node and connect into the Base(4) Input of your second blend node. Then take the Emission vector node and connect into Blend(4) input of your second blend node. In the video you will notice I used 3 blend nodes, its is not required to use 3 blend nodes to get the results.

Now we have to create a saturation node. You can right click and search for saturation.
Then we want to take the output of our second blend node and connect it to IN(3) of the Saturation node.

Let's create a vector1 to control our saturation node's intensity.

Name it Saturation and hook that up to the saturation input below in(3). Connect your saturation node to the Unlit Master, in the color(3) channel.

Lets give this a gradient color.

Next go to the top window and Save your shader.

Then create a new material and rename to whatever you want.

Then click on your new material and go to your inspector and go to the shader drop down menu and look for the Shader Graphs section. Your newly created shader should be in there.


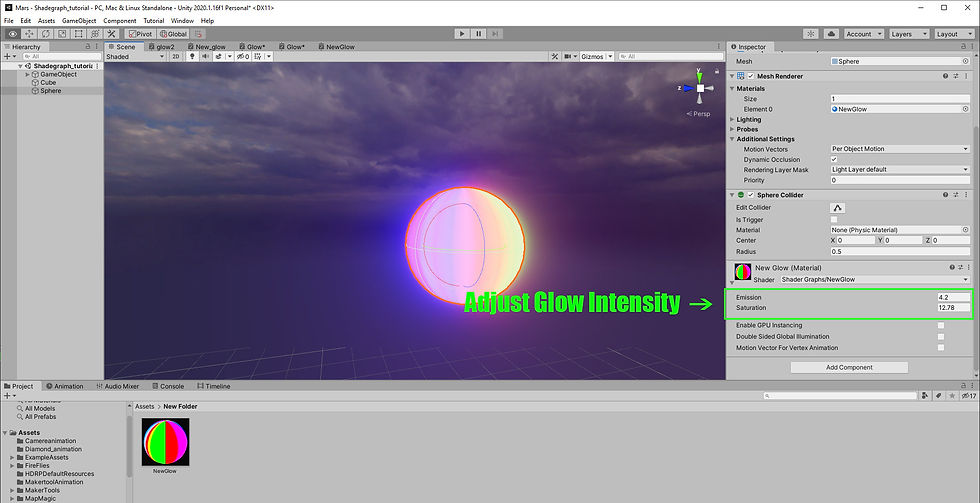
Drag and drop your new material onto your game object, make sure you have your post processing set up like bloom so you can see the effect in action. Then go to your game view to see your new shader in action. You can adjust your parameters in the inspector.

Thats it now you know how to create glowing shaders! Thank you for checking out our tutorials. You can support us by liking and subscribing to our YouTube channel. You can also donate to our Patreon. Your contribution will help us make better tutorial and game design content.


Comments